Battery switch on travel trailer function is crucial for safe and efficient power management. Understanding how your battery switch works—whether it’s a single, dual, or rotary type—is key to preventing electrical issues and maximizing your RV’s battery life. This guide breaks down the functionality, connection procedures, troubleshooting tips, and maintenance for your travel trailer’s battery system, ensuring you’re prepared for any situation on the road.
From connecting your house batteries to your tow vehicle to understanding the intricacies of dual battery systems and power management, we’ll cover everything you need to know. We’ll also delve into safety precautions and common problems, empowering you to confidently handle your travel trailer’s electrical system.
Understanding Battery Switch Functionality in Travel Trailers: Battery Switch On Travel Trailer Function
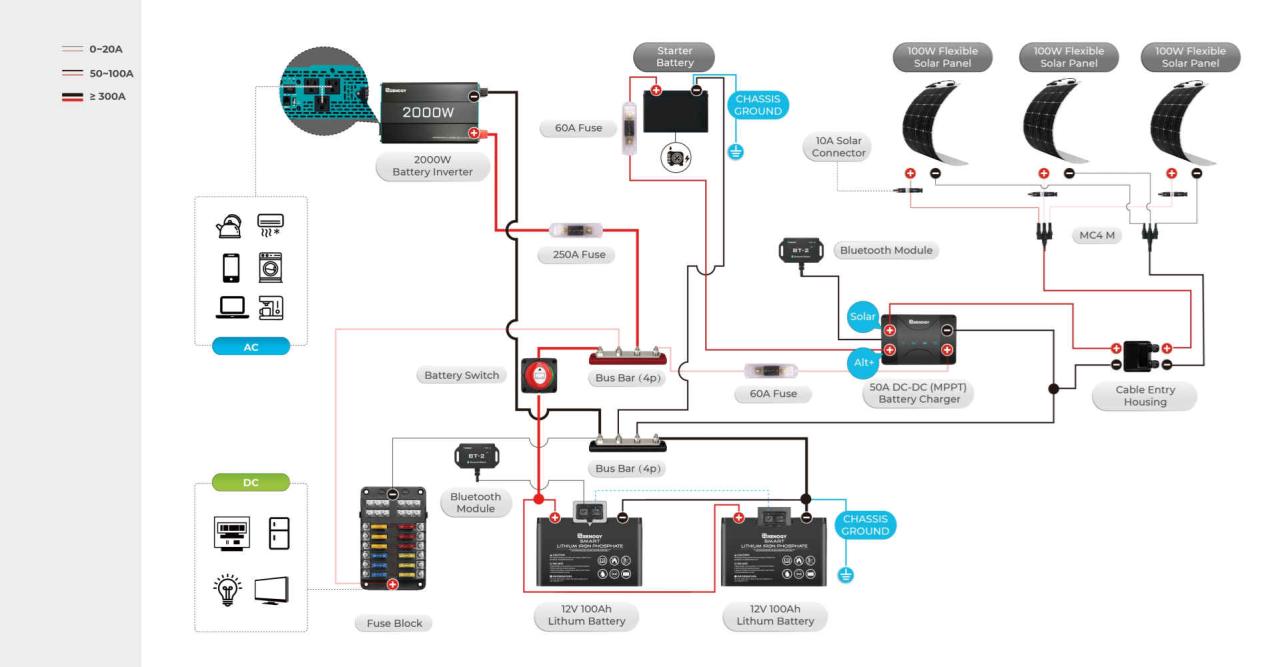
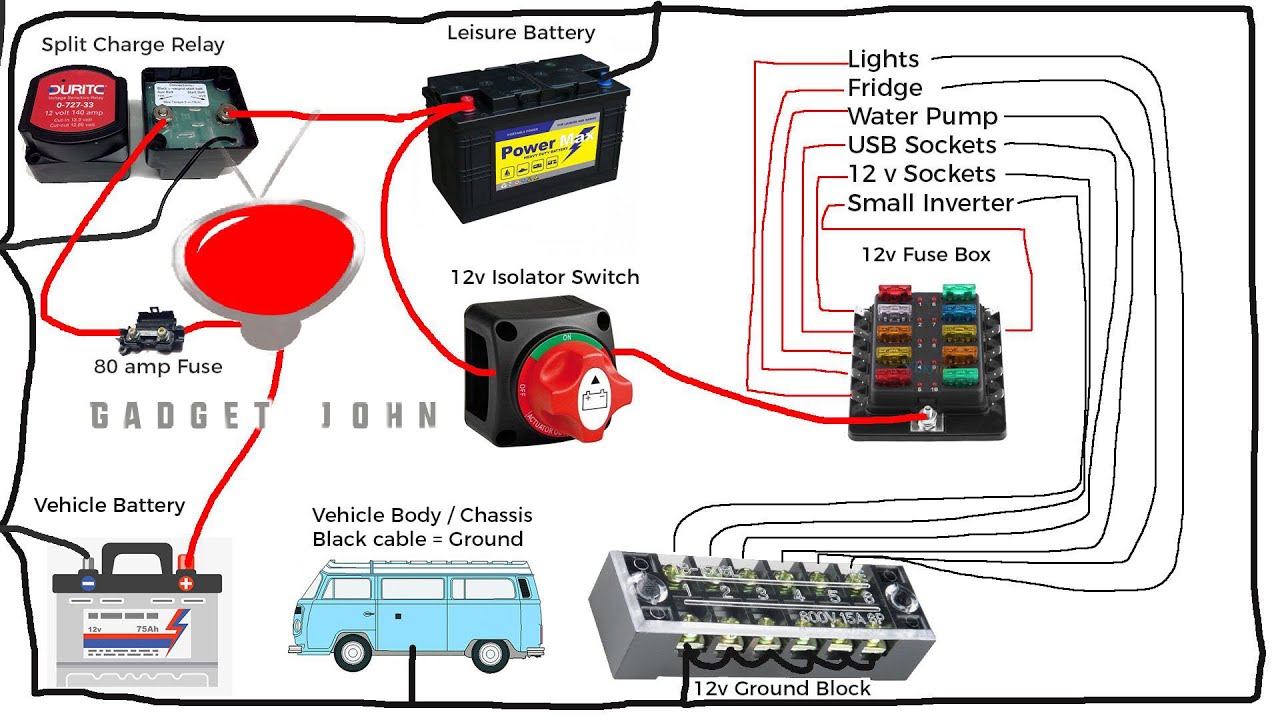
Your travel trailer’s battery switch is a crucial component, acting as the central control for your trailer’s power systems. It allows you to disconnect your batteries from the trailer’s electrical system to prevent drain when the trailer is not in use, and to select which battery bank (if you have more than one) powers your appliances. Understanding its function is key to maintaining your trailer and avoiding potential problems.
Battery Switch Purposes
The primary purpose of a battery switch is to isolate the batteries from the trailer’s electrical system. This prevents parasitic drain, which is the slow discharge of your batteries even when the trailer isn’t being used. This drain can be caused by small loads like clocks, carbon monoxide detectors, or even faulty wiring. Isolating the batteries protects them from being completely drained, leaving you stranded with no power.
Additionally, a multi-battery switch allows you to select which battery bank provides power. This is especially useful for trailers with dual battery setups, where one battery is dedicated to house power and the other to starting the trailer’s tongue jack or other accessories.
So, you’re prepping for your awesome travel trailer adventure? First things first: understand your power! Check out this guide on the battery switch on travel trailer function to avoid any dead-battery surprises. Knowing how to manage your power is key, and equally important is securing travel insurance. Before you hit the road, sort out your travel insurance – Aon travel insurance is a popular choice, offering peace of mind for unexpected events.
Getting these two things sorted will make your trip much smoother and more enjoyable!
Types of Battery Switches
Several types of battery switches are commonly found in travel trailers. Single battery switches simply connect or disconnect a single battery from the system. Dual battery switches manage two batteries, allowing you to select “Both,” “Battery 1,” “Battery 2,” or “Off.” Rotary switches are the most common type, offering a simple, easy-to-use mechanism for selecting different battery configurations.
Some more advanced systems utilize electronic switches, often integrated into battery management systems (BMS) providing more sophisticated control and monitoring capabilities.
Internal Workings of a Typical Battery Switch
A typical rotary battery switch works through a series of internal contacts. Imagine a rotating dial connected to a set of spring-loaded contacts. As you rotate the dial, different contacts are connected, creating the desired circuit path. The “Off” position disconnects all contacts, completely isolating the batteries. In a dual battery switch, different positions connect different combinations of batteries to the trailer’s electrical system.
These contacts are typically made of heavy-duty materials designed to handle the current draw of the trailer’s appliances.
Operating a Battery Switch
Correct operation of your battery switch is essential. Before operating the switch, always ensure the switch is in the “Off” position. This will prevent accidental shorts or damage to the electrical system. Then, rotate the switch to the desired position. If you have a dual battery system, carefully check which position corresponds to “Both,” “Battery 1,” “Battery 2,” or “Off.” Once you’ve selected the correct position, ensure the switch is firmly in place.
Improper positioning could lead to intermittent power or electrical problems. Always consult your trailer’s owner’s manual for specific instructions and diagrams related to your battery switch.
So, you’re prepping for your awesome travel trailer adventure? First things first: understand your power! Check out this guide on the battery switch on travel trailer function to avoid any dead-battery surprises. Knowing how to manage your power is key, and once you’ve got that sorted, think about insurance. Securing your trip with Aon travel insurance gives you peace of mind so you can truly relax and enjoy the journey.
It’s all about preparation and having a backup plan, right?
Troubleshooting Common Battery Switch Issues
Your travel trailer’s battery switch is a crucial component, ensuring you have power when you need it. Problems with this switch can leave you stranded without lights, water pumps, or other essential systems. Understanding common issues and how to diagnose them is key to keeping your adventures on track.
Common Battery Switch Problems
Several issues can arise with your travel trailer’s battery switch. Corrosion is a frequent culprit, especially in humid or salty environments. The build-up of corrosion on the terminals and switch itself can impede the flow of electricity, leading to poor performance or complete failure. Loose connections are another common problem, often caused by vibration during travel. These loose connections can create intermittent power problems or complete power loss.
Finally, the switch itself can fail due to wear and tear, age, or simply from being overworked.
Diagnosing a Malfunctioning Battery Switch, Battery switch on travel trailer function
Diagnosing a faulty battery switch involves a systematic approach. First, visually inspect the switch and its connections for signs of corrosion, loose wires, or physical damage. Look for any green or white powdery residue around the terminals – this is a clear sign of corrosion. If you find corrosion, gently clean the terminals with a wire brush and baking soda solution.
If the connections appear loose, tighten them securely. If you find visible damage to the switch itself, replacement will likely be necessary. Next, check the voltage at the battery and at the switch’s output terminals using a multimeter. A significant voltage drop between these points indicates a problem within the switch or its connections. If the voltage is consistently low at the output terminals even with clean connections, the switch itself is likely the issue.
Resolving Common Battery Switch Problems
Solutions for battery switch problems often depend on the specific issue. Corrosion can usually be resolved by cleaning the terminals thoroughly with a wire brush and a baking soda solution. Remember to disconnect the battery before cleaning to prevent accidental shocks. For loose connections, carefully tighten all terminals and ensure they are secure. If the switch itself is faulty, replacement is the only solution.
This usually involves disconnecting the battery, removing the old switch, and installing a new one, ensuring that all connections are properly made and secured. Always refer to your trailer’s wiring diagram and manufacturer’s instructions for the correct procedure. Remember to use appropriate sized wire nuts and ensure connections are watertight to prevent future corrosion.
Troubleshooting Flowchart
A systematic approach is key to efficient troubleshooting. This flowchart helps guide you:
- Problem: No power to appliances.
- Check 1: Inspect battery switch for corrosion or loose connections.
- Result: Corrosion found. Clean terminals with wire brush and baking soda solution.
- Result: Loose connections found. Tighten connections securely.
- Result: No visible issues. Proceed to Check 2.
- Check 2: Test voltage at battery and switch output using a multimeter.
- Result: Significant voltage drop. Replace the battery switch.
- Result: No significant voltage drop. Check fuses and wiring for other issues.
Maintaining Your Battery Switch
Keeping your travel trailer’s battery switch in top condition is crucial for reliable power and preventing costly repairs. Regular maintenance ensures your batteries stay charged, your appliances function correctly, and you avoid frustrating breakdowns on the road. A little preventative care goes a long way.Regular maintenance of your battery switch and its associated wiring will extend its lifespan and prevent unexpected electrical problems.
This involves a combination of visual inspections, cleaning, and occasional lubrication. Neglecting these simple steps can lead to corrosion, poor connections, and even fire hazards.
Battery Switch Maintenance Schedule
A proactive approach to maintenance is key. Aim for a visual inspection at least every three months, or more frequently if you’re using your trailer extensively in harsh conditions (e.g., coastal areas, frequent rain). A thorough cleaning and inspection should be performed at least once a year, or more often if you notice any signs of corrosion or loose connections.
Cleaning and Inspecting the Battery Switch
Before you begin, always disconnect the negative battery cable to prevent accidental shorts. This is a crucial safety precaution.
- Visual Inspection: Carefully examine the switch for any signs of corrosion, loose connections, or physical damage. Look for any discoloration, white powdery residue, or pitting on the terminals and the switch body itself. Check the wiring for any fraying, cracking, or loose connections.
- Cleaning: Use a wire brush to gently remove any corrosion from the battery terminals and the switch terminals. A baking soda and water paste can also be effective at neutralizing corrosion. Apply the paste, let it sit for a few minutes, then scrub with a brush and rinse thoroughly with clean water. Make sure to dry everything completely before reconnecting.
- Tightening Connections: Once clean, ensure all connections are tight. Use a wrench to tighten the terminal nuts securely, but avoid over-tightening, which can damage the terminals.
- Reconnect: After everything is clean and dry, carefully reconnect the negative battery cable. Test the switch to ensure it’s functioning correctly.
Preventing Corrosion and Extending Lifespan
Corrosion is the biggest enemy of your battery switch. To combat it:
- Apply a thin layer of dielectric grease to the battery terminals and switch terminals after cleaning. This creates a barrier that prevents moisture from reaching the metal, thus inhibiting corrosion.
- Keep the battery compartment clean and dry. Proper ventilation helps prevent moisture buildup.
- Use battery terminal protectors to further shield the terminals from the elements.
- Consider using corrosion inhibitors specifically designed for battery terminals.
Lubricating Switch Components
Some battery switches may have moving parts that benefit from lubrication. If your switch has a lever or rotating mechanism, you might apply a small amount of a silicone-based lubricant to the moving parts. Avoid using petroleum-based lubricants, as they can attract dirt and grime. Only lubricate moving parts; avoid applying lubricant to electrical contacts.
Mastering your travel trailer’s battery switch isn’t just about convenience; it’s about safety and extending the life of your batteries. By understanding the different types of switches, proper connection techniques, and common troubleshooting steps, you’ll be equipped to handle any electrical situation with confidence. Remember regular maintenance and safety precautions are your best bet for smooth sailing on all your adventures.
Question Bank
What happens if I leave my battery switch in the “off” position for an extended period?
Leaving the switch off for a long time won’t damage the switch itself, but it will prevent charging of your house batteries. This could lead to a dead battery when you need it.
Can I use a different type of battery switch than what came with my travel trailer?
It’s possible, but ensure the amperage rating of the new switch matches or exceeds your battery’s requirements. Improper amperage can lead to overheating and fire hazards. Consult a qualified electrician if unsure.
How often should I clean my battery switch and terminals?
Ideally, inspect and clean your battery switch and terminals at least twice a year, or more frequently if you notice corrosion.
My battery switch feels stiff. Is this normal?
Some stiffness is normal, but excessive resistance indicates a potential problem. Check for corrosion or binding. Lubrication may help, but if the problem persists, replace the switch.
